Besides the Civilization series, the other turn-based strategy franchise I've played a lot is Heroes of Might and Magic. (Only HOMM 2 and 3, and I prefer 2.) Here's a writeup of a speed run through one scenario in HOMM 2.
HOMM games don't support the epic-narrative style of reporting as well as Civilization. Each scenario is played on a predesigned map with only one win condition (rarely two) and only one goal of speed. Each predesigned map is its own entity; there is no comparison across different maps that differ wildly in size and resources and opponent strength. There does exist a capability in the editor to generate a random map, but that never really caught on among HOMM players; random maps lack the overall coherent layout and integrity of a professionally made level.
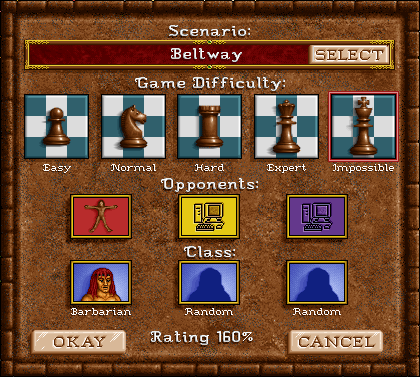
I'm choosing the Beltway map of HOMM 2 for this exercise. This is an introductory scenario, lush in resources with much land to explore and little conflict with few AI opponents. This is a good canvas to demonstrate an optimized speed run as compared to a casual playthrough.
I am playing on the highest difficulty rating, since difficulty sets a multiplier for your in-game score. I'm really playing for highest score rather than purely speed; difficulty applies a multiplier to your speed score. And also because the hardest difficulty is the most interesting. The major difference between difficulty levels is your starting resources; on Normal you get 5000 gold and 5 of each resource, which declines down through the levels to 0 of everything on Impossible. Harder difficulty also grants the AI players extra resources and more available troops per castle; I think it is 1000 gold/day and 50% more troops on Impossible.
I'm using a Barbarian faction castle. The other contender for a strong early game is the Knight. Both might-based castles ramp up with more strength in the first three troop levels than that of any of the spellcasting factions. Compared to each other, the Barbarian and Knight troops at each level are close in quality, but the Barbarian castle builds up faster, because the Knight's troop dwellings have extra requirements in the well and tavern structures that we wouldn't otherwise build.
Might-based heroes themselves (you can use a hero of any faction to lead troops of any faction) are also better to get going, with several points of attack and defense stats that are much better than any spellcaster before you build any mage guilds to supply any spells. Compared to each other, knight heroes are somewhat better than barbarians, thanks to good secondary skills in Leadership and Ballistics, while the barbarian's Pathfinding will be blank on this smooth map. Barbarian stats are slightly better (attack is better than defense) but either class is fine overall.
I left my opponents as random, mostly because it defaults back to that every time you restart, so otherwise it'd take a lot of extra clicking to reset them on every restart. I don't have any great preference anyway as to what would be weak to fight against. I think the Necromancer is generally the weakest castle in a time frame too short to ramp up to bone dragons, but it's not a drastic difference, at lower levels the AI performs about equally mediocre with any faction.
So here begins where a speed-run diverges from what would be typical casual play. First we are going to look at the entire map ahead of time in the editor. Exploring the fog can be fun subjectively, but for the purposes of solving a speed-run, we want to know exactly where everything is.
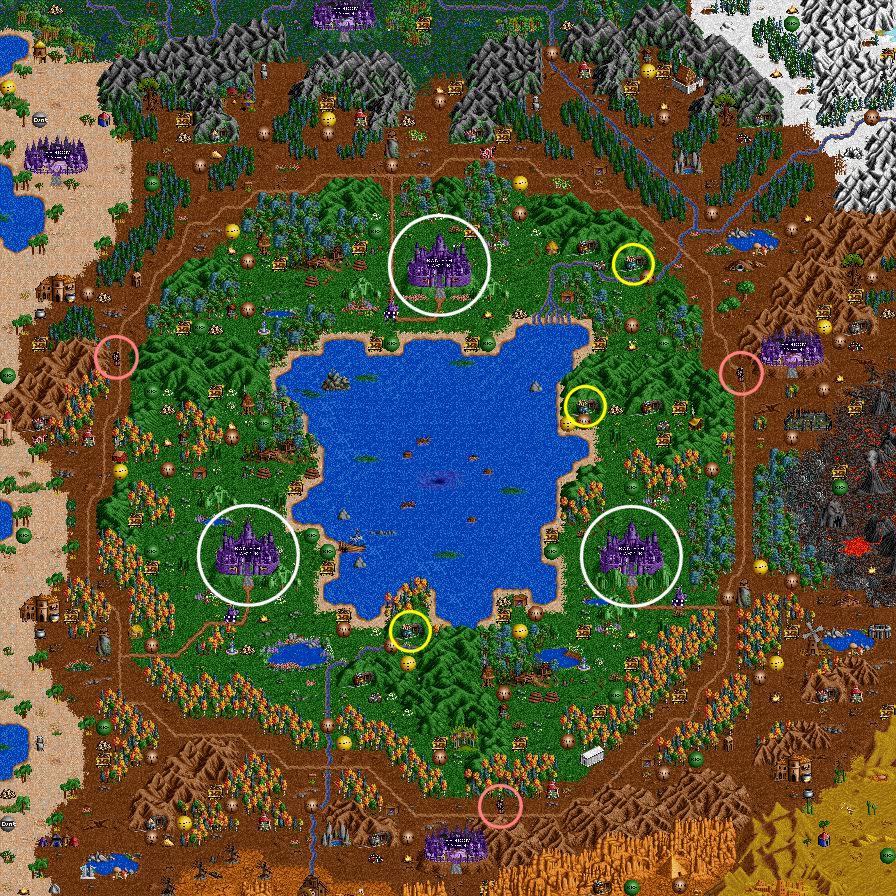
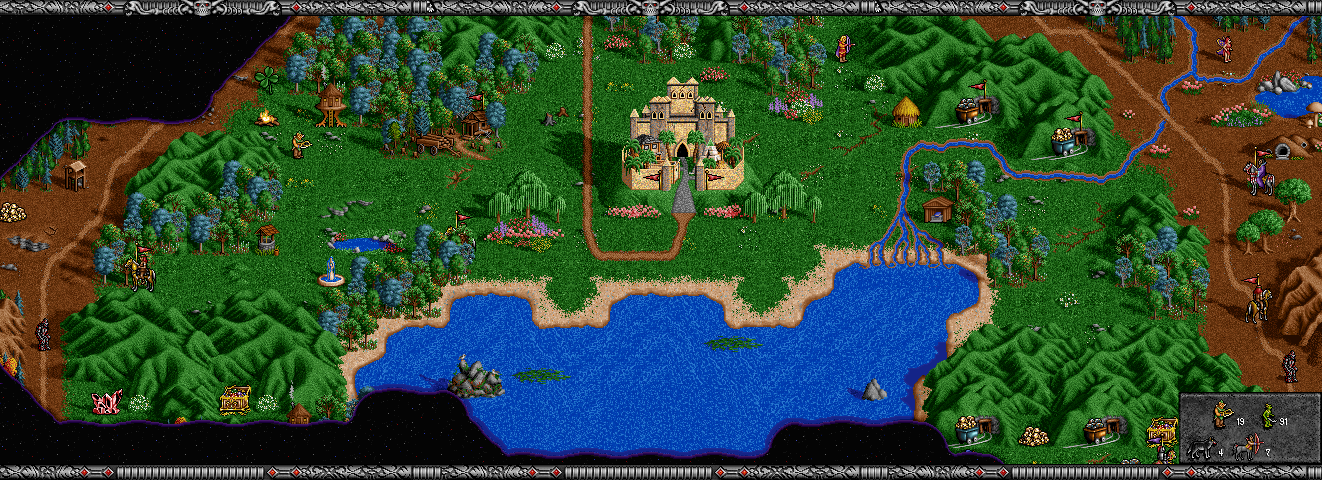
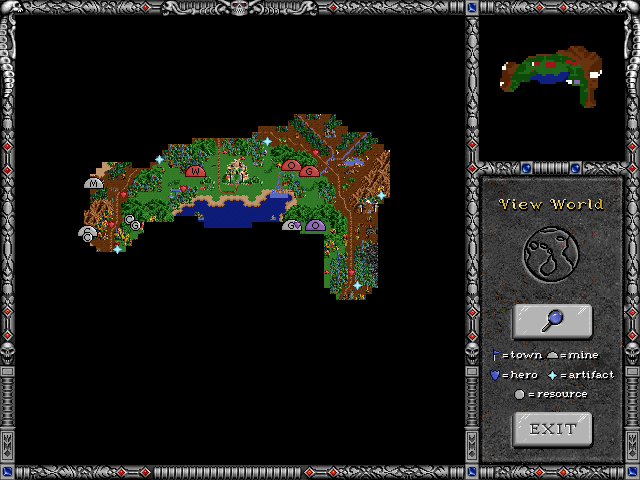
This is a view of most of the Beltway map, from a few editor screenshots stitched together, minus some of the outer edge that won't come into play. Three players each begin with a castle around that central lake, circled in white. These are separated by chokepoints guarded by a moderately strong stack of wild monsters: each red circle highlights a group of 5 Fire Elementals. You are meant to explore outwards to the lands that mostly contain weak monsters, then come through the fire elemental chokepoint when you are ready. For a speed run, we will as soon as possible break through those chokepoints and conquer each enemy castle, then mop up the enemy heroes.
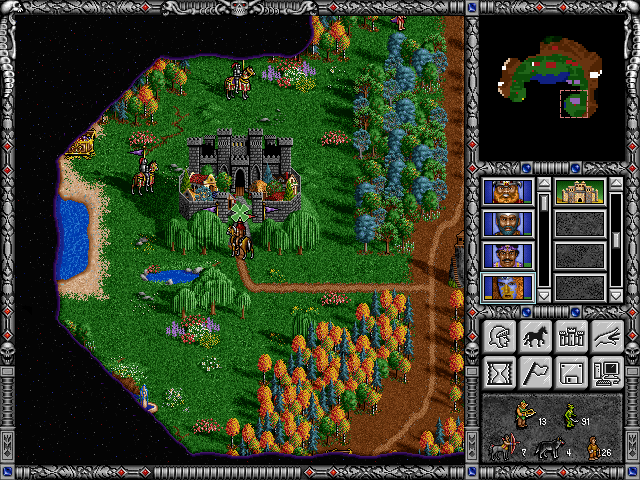
I am playing the red player, which is the castle in the top center. The reason is that this castle has the best strategic location relative to its gold mine, which are each circled in yellow. This gold mine is right on the way to my objective of the choke point, while the gold mines near the other two castles are tucked off into side nooks. My strategic overview is simple, dispatch an army in each direction to reach and capture the enemy castle, before day 1 of week 2 when their new troops come available.

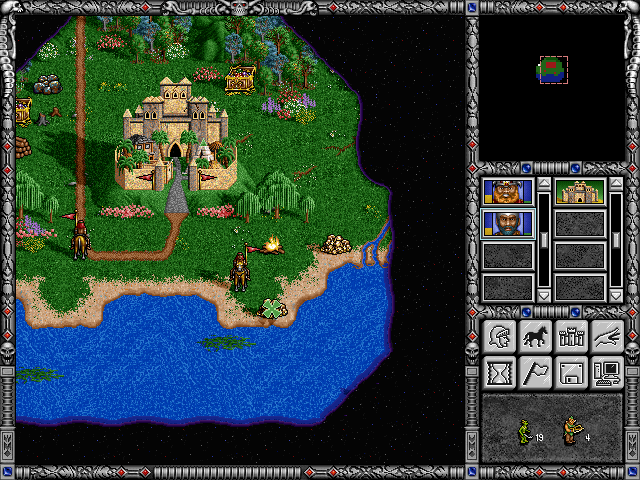
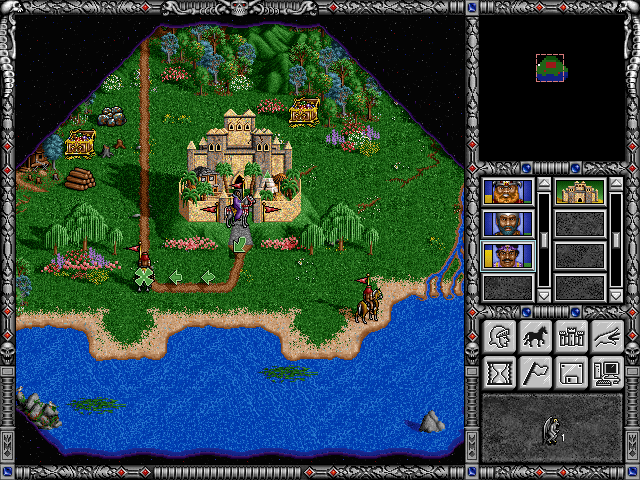
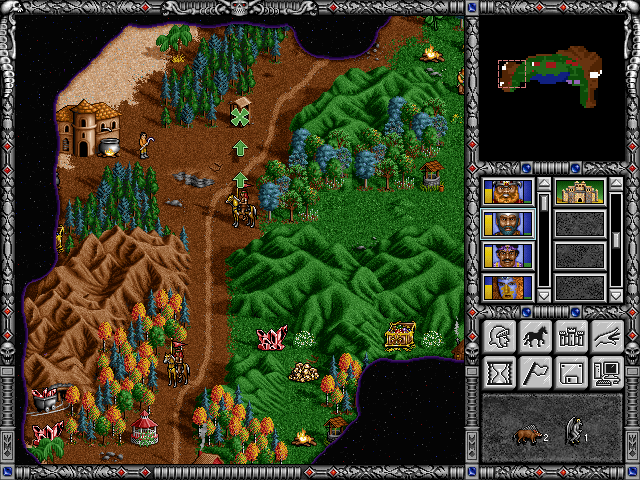
Here we begin. First some words on the starting conditions. There is a random chance (25% I think) that your starting castle begins with the second-level monster dwelling in addition to the first; of course I restarted until that freebie appeared. I also restarted until at least one of the three visible variable resource piles was ore, which a barbarian castle will need; and here it so happened that the others are wood and gold which both also help. I also ensured that the nearby treasure chests would add up to a good value of gold (each can randomly yield 1000, 1500, or 2000.) Finally I played ahead one turn to go look at the monster stack guarding the gold mine to make sure that wasn't too strong. All of this took about 100 restarts to come together to get right. (Restarting goes very quick, just a few seconds and clicks each time, just a few minutes total.)
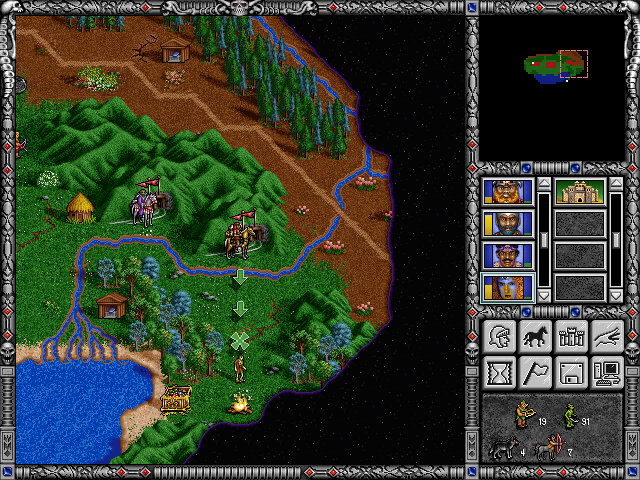
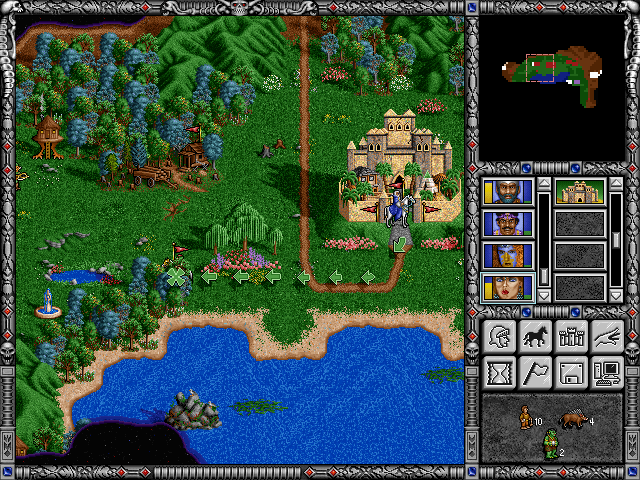
The first move is as shown by the green movement indicators. The western barbarian (Crag Hack, the orange-bearded guy) moves south to pick up that chest (1500 gold) and wood. With that gold, I build the Den in the castle, which provides wolf troops available for hire. I buy one wolf, which the second hero Fineous (gray beard) takes while leaving all his slow troops behind.
Fineous moves southeast to pick up those goodies. But notice that he's actually doing it wrong in this picture! He should NOT click on the gold pile and campfire from where he is standing. Doing it that way consumes a diagonal movement step (1.5 movement points) for each. That's a waste if he's going to continue moving eastwards after that.
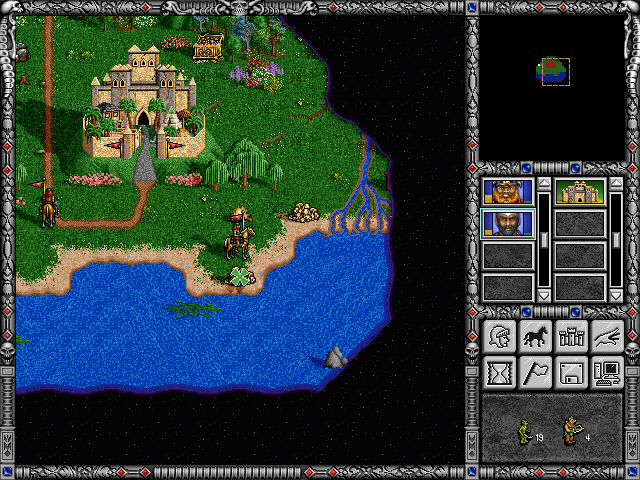
This is the correct way to do it: first move one more step east, then pick up the gold and campfire with shorter orthogonal steps instead of diagonal. This sort of thing with subtle tricks to save movement happens quite a bit on the HOMM adventure map. Covering every detail is beyond the scope of what I'm trying to show here, but this one incident gives you an idea. Anyway, what Fineous picked up was a treasure chest (also 1500 gold), the campfire (500), and two gold piles (900, 500).
Now I hire my next hero, Wrathmont the Warlock. He comes with 8 centaurs and 2 gargoyles. He leaves the centaurs and one gargoyle in the castle, and goes to trade to take Crag Hack's starting troops and give him one gargoyle for very fast movement. Crag then continues northwest to that next treasure chest, which yields the maximum 2000.
I then hire one more hero, Jaclyn the Barbarian, who will be the lead fighter going east just because she is the one with movement available to go in that direction. She leaves her slow starting troops in the castle and takes the one remaining gargoyle with her as far east as she can go.
Finally Wrathmont returns to the castle. I buy another wolf. Wrathmont puts his slow troops in the castle and holds on to only the wolf. Each hero moves at the speed of the slowest army that they had at the start of that day. By stashing the slow troops overnight, Wrathmont will start tomorrow with very fast movement thanks to his wolf, but then can take all the troops at that speed.
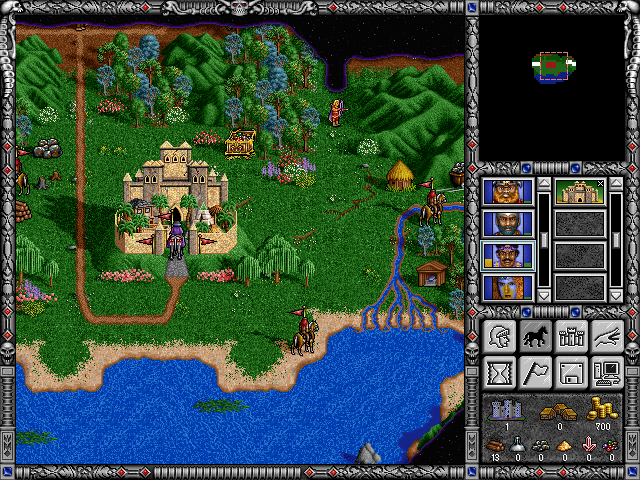
So this is what everything looks like at the end of day 1.
Day 2 begins with Crag Hack picking up the sawmill and all the resources over there, including that one more chest which yields another solid 1500. Also notice the peasant stack down there at the edge of the fog. I need to go this way soon, so it's very nice to have the weakest monster stack possible there.

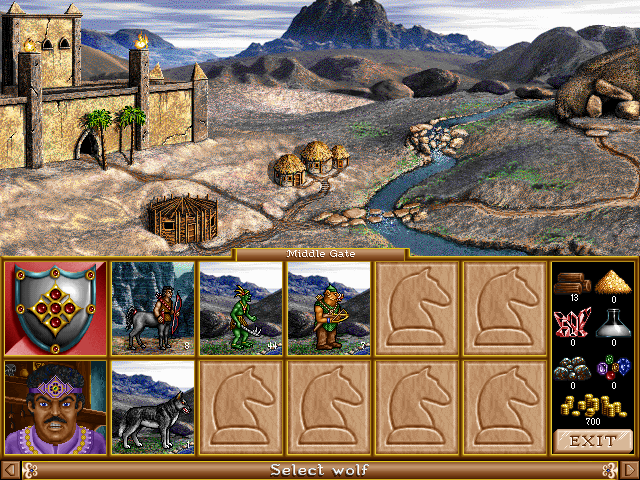
We are now ready to march. In the castle, Wrathmont buys all available troops: 3 more wolves, 8 orcs, 10 goblins, which plus all four heroes' starting troops makes the army you see there. He will carry them over to Jaclyn in the east. Along the way he will stop at that yellow-roofed house. That is a goblin dwelling; each week there will be some number of goblin troops available to join you for free. Here I got 18, which is on the lower end of what is possible to get.
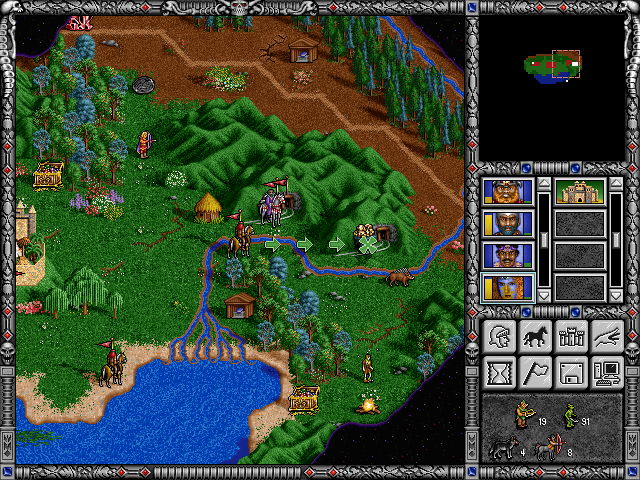
Wrathmont had enough movement left to claim that ore mine as well. Before that, he traded his troops to Jaclyn carefully using the right spot to do so, the one step inbetween the goblin hut and ore mine, because from there he could trade with Jaclyn using an orthogonal step instead of a diagonal step. Anyway, Jaclyn is ready to make the assault on the gold mine, which here is guarded by a pack of boars.
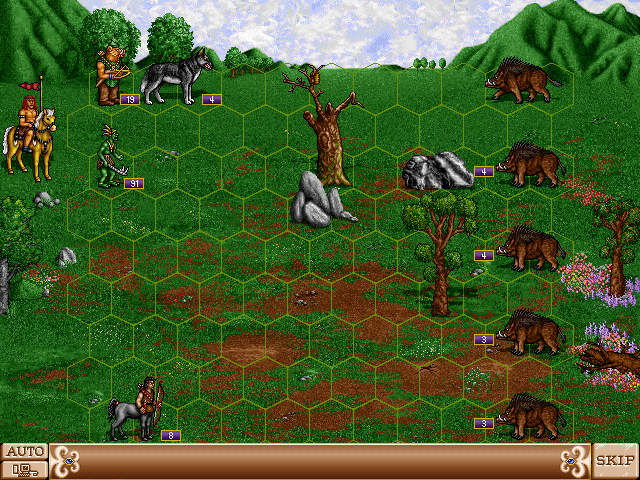
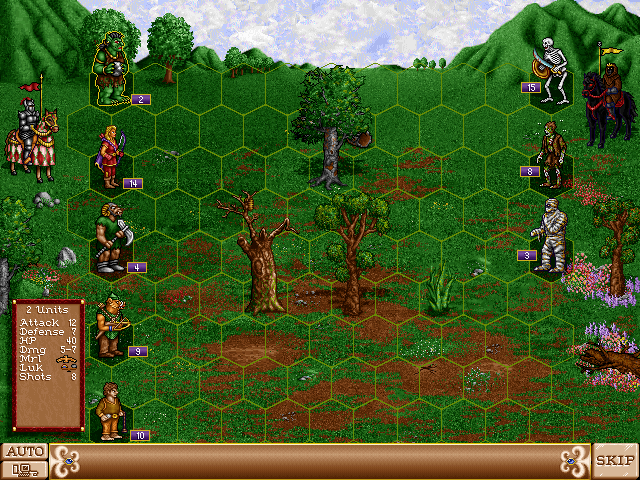
Here's our first battle, Jaclyn against the boars. My first move was to position my wolves as shown. In exactly this spot, I am allowing the topmost enemy boars to attack my wolves. I want that since my stack is stronger and its retaliation will deal more damage than the boars will.
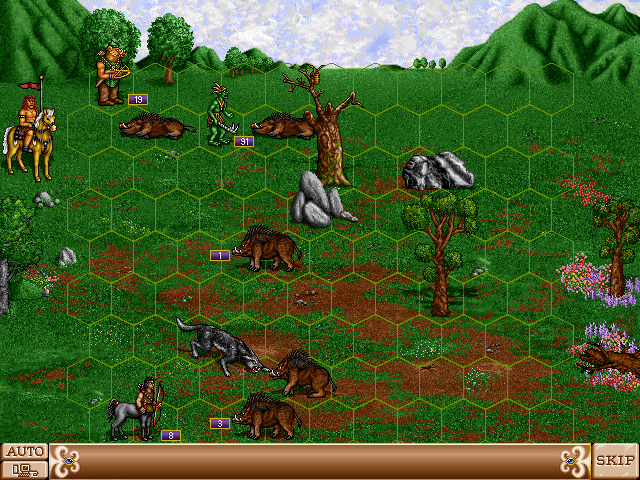
Here's how the battlefield looks a moment later. The second stack of boars moved where my goblins could kill it. The orcs shot the middle stack down to 1 boar. The centaurs shot the top stack, which then died after it attacked the orcs and the orcs retaliated. This picture is at the start of round two, as my wolves take care of another stack of boars.
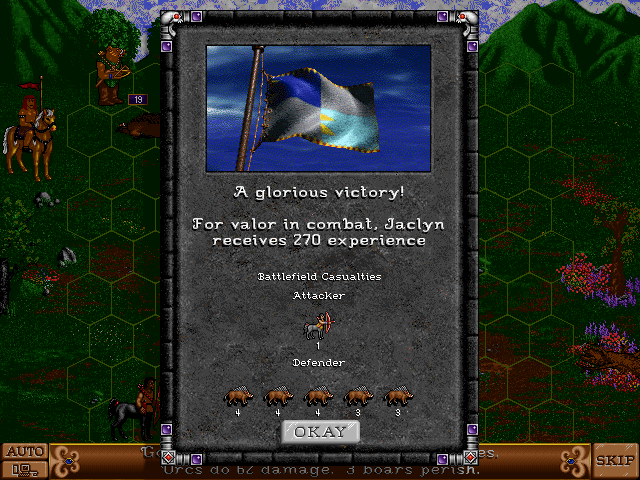
The bottommost stack of boars did get through to kill one centaur, but that is quite an acceptable loss to claim a gold mine.
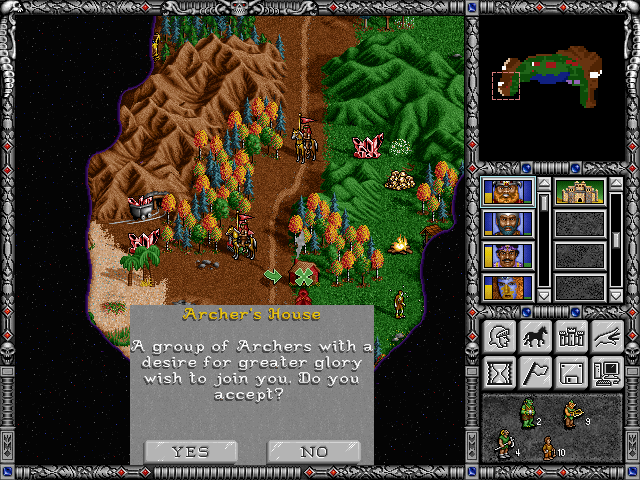
Jaclyn can now move on to the next target, a pack of zombies guarding yet more goodies. But this happens:
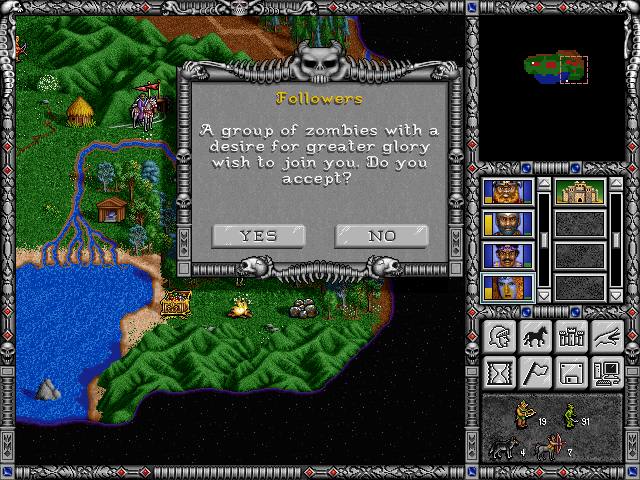
The zombies offer to join me! This can happen. Every wild monster has a 20% chance (determined at game start) of being internally designated as friendly. There is no way to know this other than to encounter them. If you encounter such a stack and your army is at least 2x their strength (measured in HP) and you have an empty slot, they will offer to join you.
But I say no. Zombies are the absolute worst type of random monster to join. They deal little damage, and very-slow walkers are terrible in battle, a movement speed of 2 hexes takes forever to get anywhere useful. And all undead inflict a negative morale penalty on everyone else in the army. And I know there is something else coming to fill that fifth army slot instead. I don't want the zombies, I'd rather kill them for the experience, so I do.
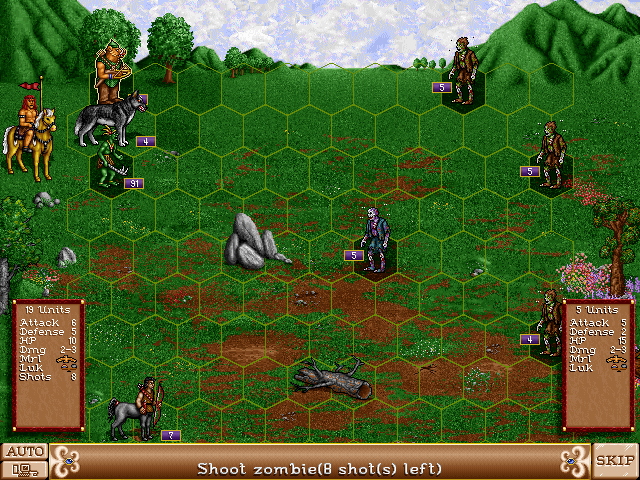
I move my wolves and then goblins to box in the orcs for protection, but that turns out to be unnecessary, my orcs have plenty of time to shoot down the very slow zombies before they get anywhere. In the middle is a stack of upgraded mutant zombies instead, at average speed; that I take care of by waiting for them to walk into range of my goblins that are numerous enough to kill them in one hit.
After killing the zombies, Jaclyn picks up the goodies beyond them. The chest is only worth 1000, but it still comes to enough to build the Adobe in my castle, the dwelling to supply Ogres.
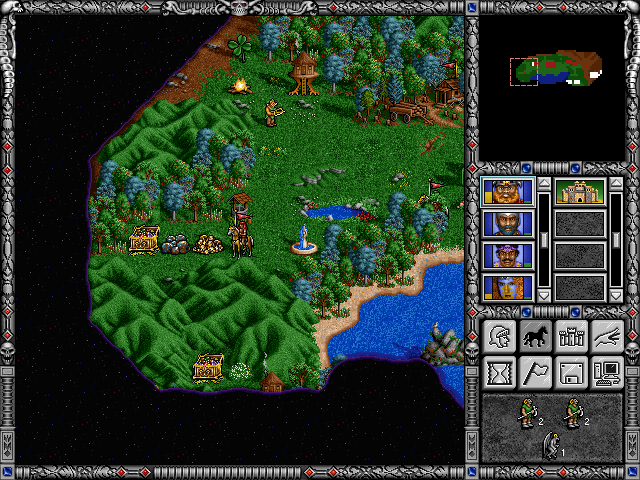
Finally, Fineous picks up the last chest near home (behind my castle) and moves back towards home, while Crag Hack in the far west positions himself to receive a troop convoy from Fineous next turn.
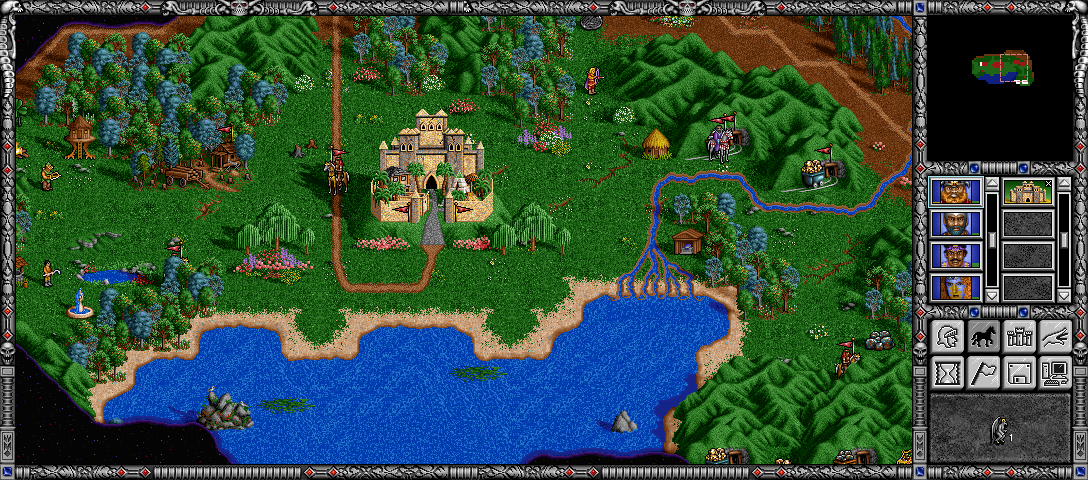
Here is how everything looks at the end of day 2. (It's so great how 2D pixel games make it possible to seamlessly stitch together screenshots into a wider view. Can't do that with any 3d-rendered graphics.)
Yes, all of this so far was only two turns. This is starting to show how a speed run works. Most strategy guides don't describe what I've been doing here. The guides are always full of high-level tips, ratings of the best top-tier monsters and fourth- and fifth-level spells, directions to build your castle up to that by week three or four.
Forget all of that, that doesn't get you speed and score. It's not about building up the best armies, it's about cobbling together whatever you can scrape out of cheap low-level structures and heroes' starting troops and whatever dwellings you find on the map. Building up castles is for suckers. A Statue costs 1250 and pays back 250/day. You know what pays back faster than 5 days? A hero who picks up two treasure chests, or troops that beat a stack of monsters to access more goodies.
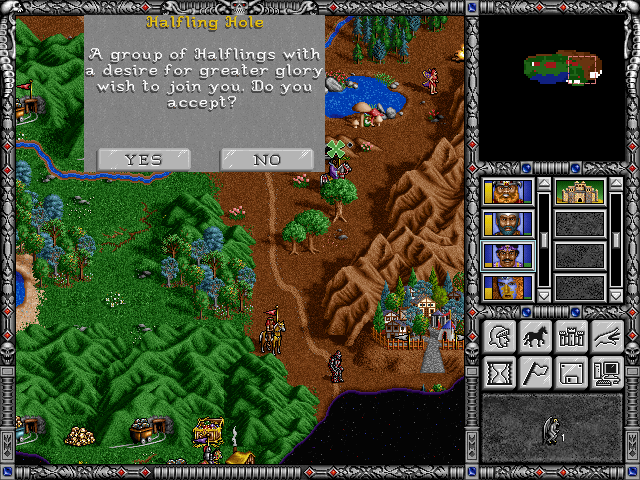
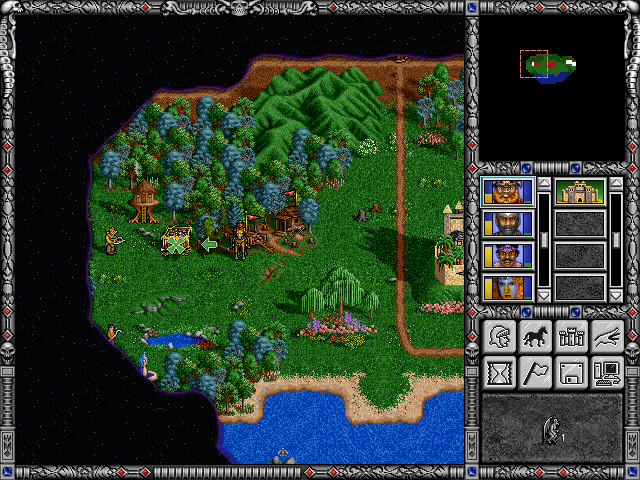
Day 3: Wrathmont proceeds to this halfling hole, where he picks up a stack of 26 halflings. I knew this was here; these are the troops for which I saved Jaclyn's open slot instead of accepting the friendly zombies. South of that, Jaclyn could attack the fire elementals this turn, but instead I decide to play that safe and wait one more day until Wrathmont can catch up to pass over the halflings. I'm OK to take a small delay here; the target castle here on the east side isn't my limiting factor to the finishing speed; it will take longer to reach the other target west of the lake.
Back at the castle, Fineous buys the four ogres and convoys them to Crag Hack, who attacks that group of peasants to the west.
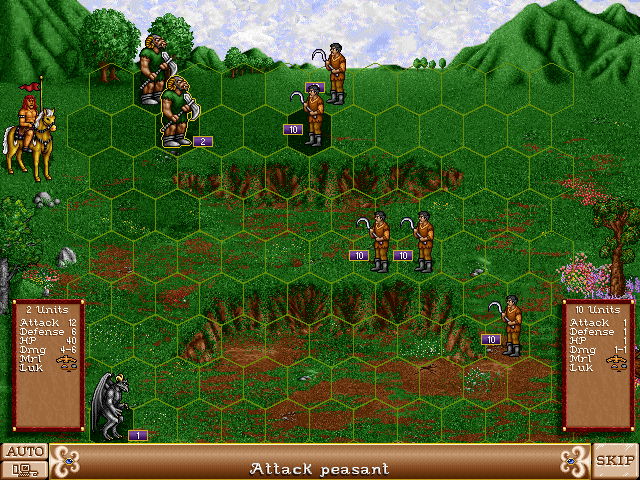
I split the ogres into two stacks of two. I correctly expected that two ogres in a stack would be enough to one-shot each peasant stack; the ogres deal more than double their base damage with an attack rating boosted to 12 by my barbarian hero, to the peasants' 1 defense. On top of that, I even got a favorable battle terrain layout, where my ogres could take on only two peasant stacks on top of that little ridge rather than getting surrounded by all five at once. I might have used that gargoyle to distract away one stack of peasants briefly, but that wasn't needed.
Of course I easily won this with no losses. This illustrates that principle: the way to minimize losses is to manage the damage you take, such that it won't add up to enough to kill any one troop, since damage doesn't carry over between battles. Ogres with 40 HP are excellent for this and a reason to choose the barbarian castle. Trolls are even better as we will see shortly.
Past the peasants, Crag Hack discovers another beautiful sight: one more pile of ore! I did not know yet that this was here, but it's perfect.
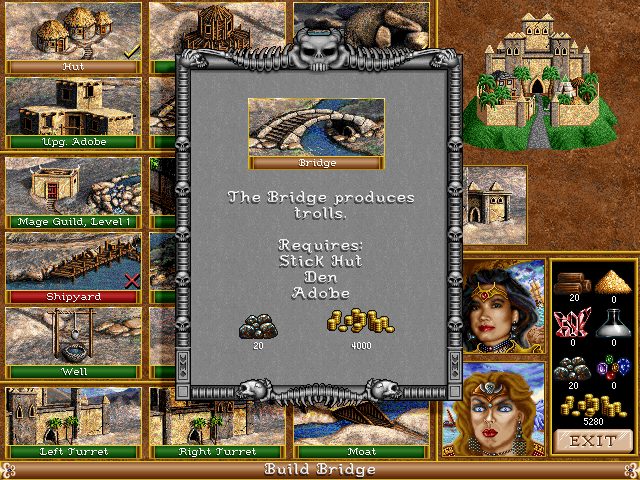
That comes to exactly enough ore to buy the Troll Bridge in the castle! (I did have slight leeway here, that the ore mine would produce 2 more units next turn.)
Overview at the end of day 3.
Day 4: Wrathmont delivers the halflings to Jaclyn, who takes on the fire elementals.
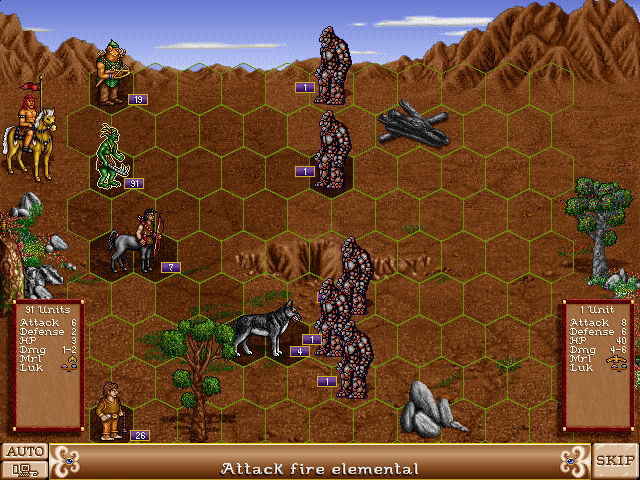
It worked out nicely how the AI behavior lined up. Importantly, the second fire elemental (not really a stack, there's just 1 unit) walked up exactly where my goblins could reach and kill it. So in the first round, each of my goblins, orcs, and halflings wiped one of the fire elementals. Then they mopped up in round two incurring zero losses. The topmost elemental did get through to make one attack on my orcs, but I knew it could not inflict enough damage (10) to kill one.
After the battle, Jaclyn continues all the way south, to what should be striking distance of the purple player's castle next turn, to the west along that branch of the road. Wrathmont turns back northward along the beltway to seek more money.
In the west, Crag Hack picks up this one pile of gold, getting 600. That makes enough in total for this:
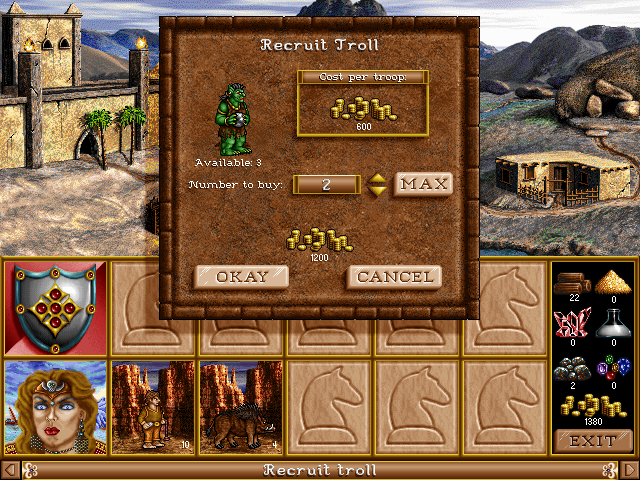
I have enough money to hire another hero at my home castle, plus buy two trolls from the bridge. (I'd love to also hire the third, but I have no way to get another 600 gold, and I can live without it.) This is the last thing I would do at my castle in the game.
This new hero Dawn can carry those trolls out to to Fineous who can convoy them all the way to Crag Hack this same turn. These "hero pipelines" are well-known as the strategic hallmark of the HOMM series and how to swing troops great distances in a single turn for speedrunning.

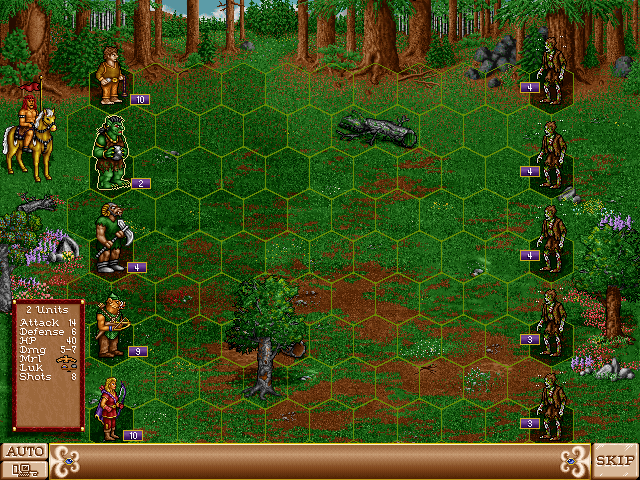
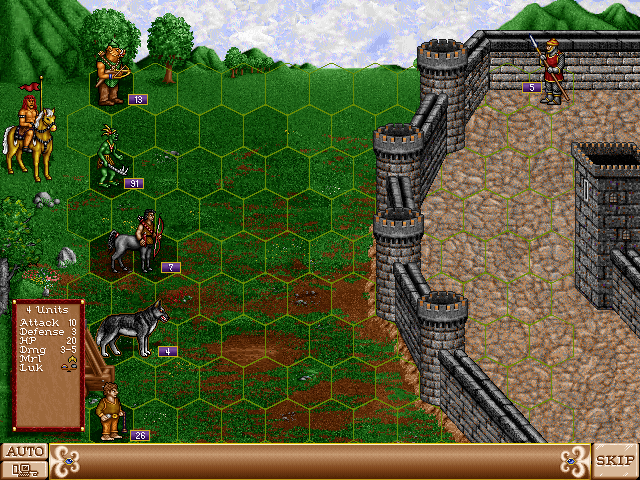
So Crag Hack is also ready to take on the fire elementals on his side of the map. His army is shown there, the four ogres and two trolls, plus also the wolf that he was using for movement (no reason not to use it, since Dawn came with very fast boars to distribute to herself and Fineous for movement), plus we may as well also make use of Dawn's 10 starting halflings.
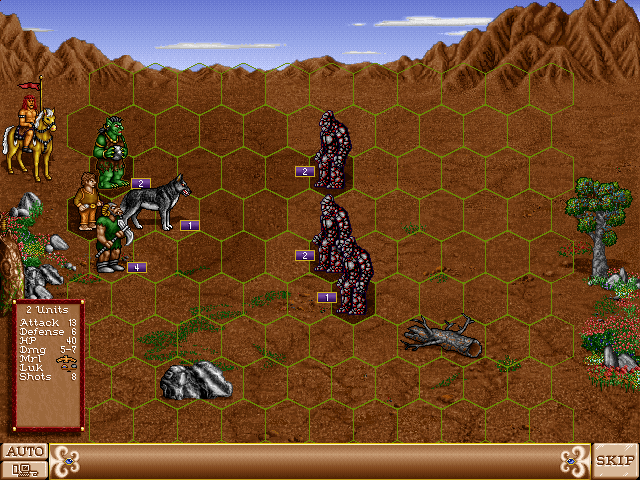
For this battle, I use pocket formation to protect the fragile halfling shooters. With the wolves in front of them and everything else packed closely, the enemy cannot reach the halflings.
I have already clinched this battle: it is impossible to lose it from here even if I wanted to. Trolls have a special ability: they regenerate every round to full health, to wipe out all damage that came short of killing a troll (40 HP). This group of enemies cannot deal more than 40 damage in a round, so they can never kill a troll! But the AI will always attack a shooter stack above all other possible moves, so the fire elementals will beat up on the trolls and leave the wolf and ogres alone. Victory is guaranteed thanks to the trolls' regeneration; all I have to do is keep the halflings walled in and this arrangement will also guarantee no losses.
The troll regeneration ability isn't broken in general. The units are costly and deal little damage compared to other level-five troops. The regeneration doesn't keep up at all against high-level attackers like phoenixes and dragons. But at low levels, that regeneration can indeed wipe out any possible losses, and this trick is a key reason to use barbarians for a speed run. (It's also amusing to get into the situation of two opposing trolls that can never kill each other. Sadly, that's functionally a lost battle for the player, since the computer will never get bored and you'll have to give up and retreat eventually.)
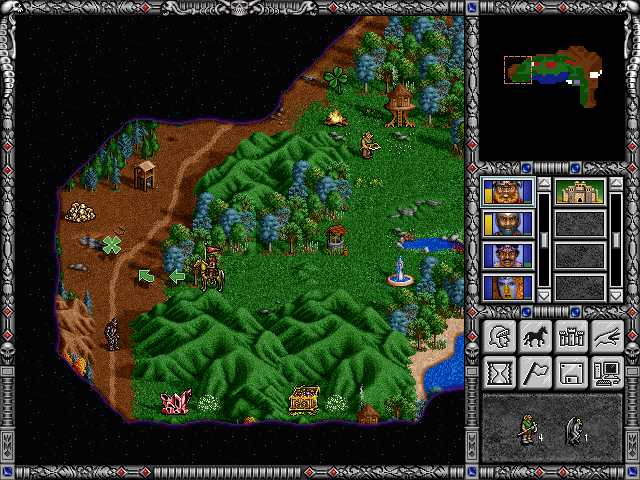
End of day 4; for a change I'll show the in-game high-level overview rather than pasting together the regular view.
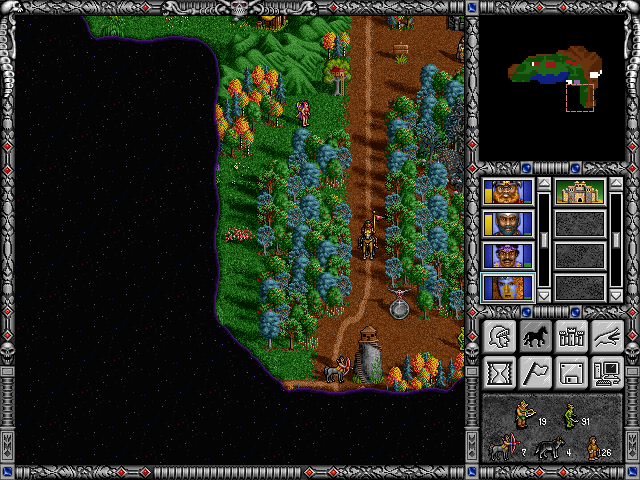
Day 5: Fineous picks up some orcs at this Watch Tower to deliver to Crag Hack. I did not take these before the fire elemental fight because they actually would have been a liability. The AI goes for the shooter stack with the highest HP first, so 9 or more orcs (90+ HP) would have been targeted before the two trolls (80 HP).
Besides the orcs, Crag Hack also visits this house to pick up some archers. In the picture, he's currently standing on a gazebo, which gives 1000 experience, enough for a level, which in this case gave Crag a very helpful Leadership skill that would make up for the morale penalty for employing 3 factions in the same army. Crag is on his way to this enemy castle, with that pack of zombies his next obstacle.
This is what his army looks like now. Four shooter stacks, which is normally quite risky, any flyers to block them can pose quite a problem. But I have confidence that the trolls can soak up as much of a beating as I need them to. In this particular fight, of course all the shooters wrecked the zombies long before they got to me.
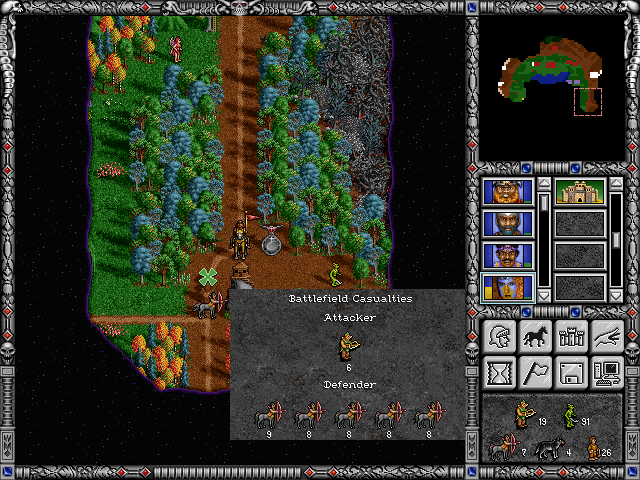
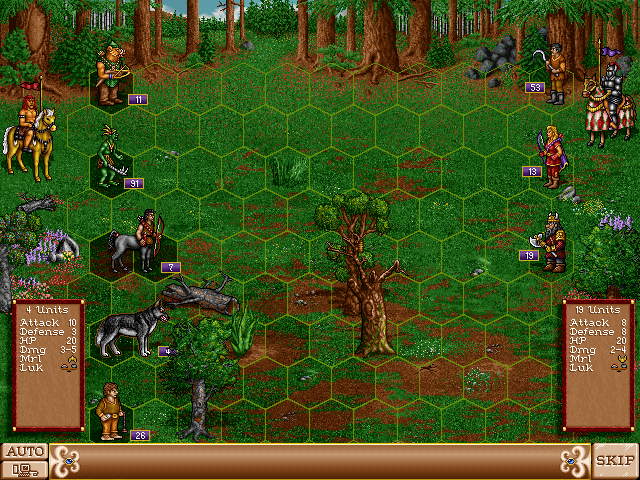
Over in the east, Jaclyn has to fight this stack of centaurs to get through to the enemy castle. This was not optimal; I had no way to block the centaurs quickly, nor to shoot them first since all my own shooters are slower. I lost 6 orcs to the enemy shots, regrettable, and I can only hope I still have enough to finish the job.
This is what speed in HOMM is about: it is not about winning fights, it's about doing so with minimal losses. This hero can only go as far as her troops hold out. I can add no more troops until day 8, and it would take a pipeline of three or four heroes to get all the way here from my home castle. Like in FTL, a win where you incur several points of damage is really a loss against the war of attrition.
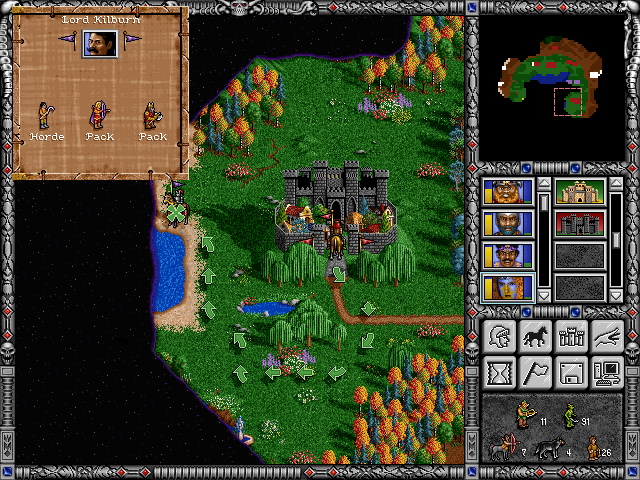
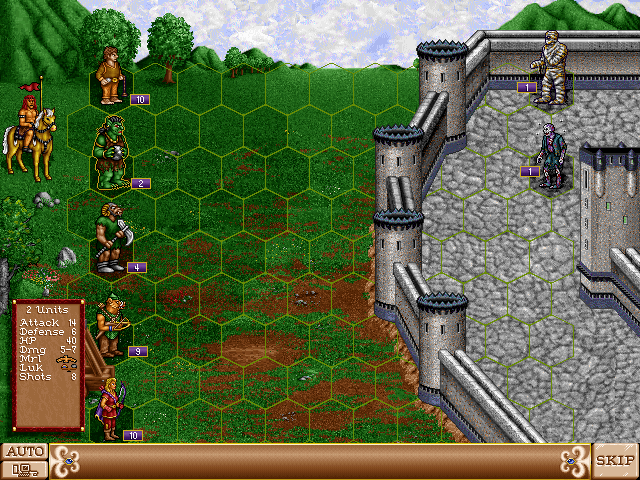
Jaclyn does reach the enemy castle. There is an enemy hero to its west. I'm hoping he's got all the armies and the castle is weakly defended. You can get information about what's inside an enemy castle if you build Thieves' Guild structures in yours; but I have no intention of spending money on that. So I'm going in blind.
Hah, it has all of five pikemen on defense. My shooters easily take those down, although the auto-garrison does kill two of my orcs over two rounds of combat.
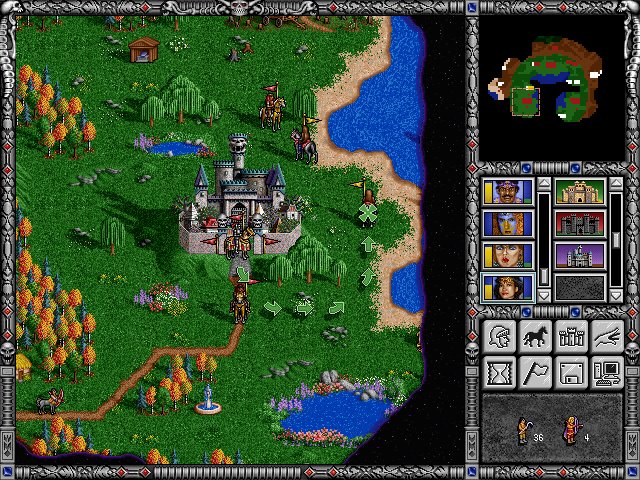
Afterwards, Jaclyn has one movement step left on the overmap. It may be possible for a newly hired hero to take the troops and reach and kill that AI hero on this same turn. But I'm worried about the second AI hero to the north - he might be able to reach and kill Jaclyn or the castle, which would be a major pain. Smarter is to simply let Jaclyn stay in the castle overnight. She can also pick up a spell book from the mage guild the AI built for me. And of course she parks the slower troops in the castle itself, holding only the wolves overnight for very fast movement tomorrow.
Day 6: Jaclyn got what she wanted out of the AI movements. One hero stayed just within range to attack, with troops weak enough that I know I can take out easily. The other AI hero disappeared into the fog to the north and definitely can't reach the castle this turn.
Easy fight. I did lose two orcs to the enemy archers, but my shooters took those out on the second round and then had plenty of time to shoot down the very slow walkers.
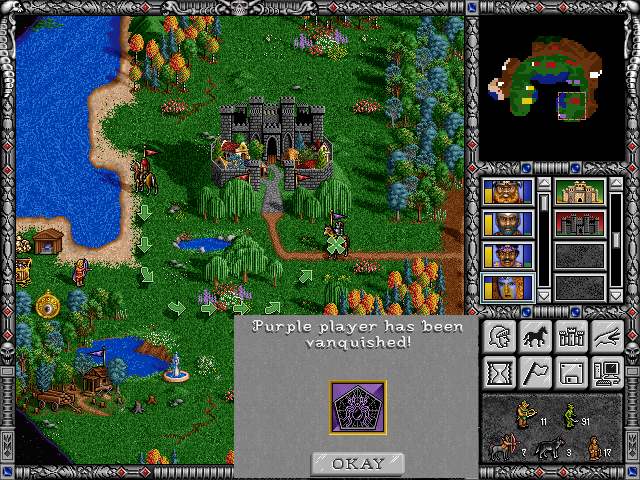
Day 7: That other enemy hero did come back towards the castle, who Jaclyn easily intercepted to finish off my work on this side of the map.
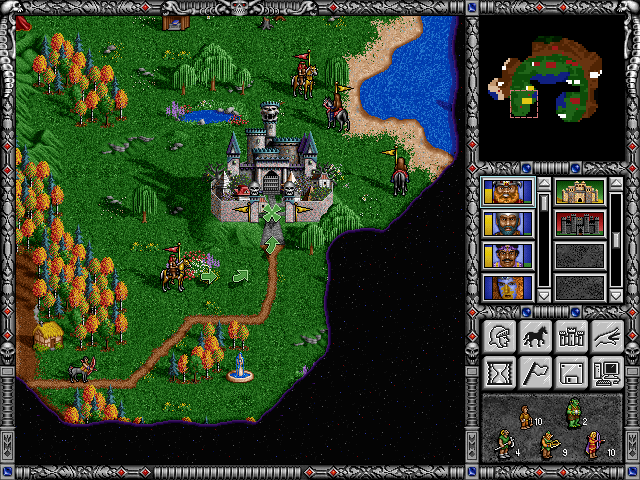
Crag Hack had been unable to reach his target on day 6, as I'd expected. Here he is about to do so on day 7. Again I don't know what's in the castle, but the AI tends to ineffectually divide its stacks among multiple heroes and leave little in the castle.
One mummy and one zombie, which we wiped in a single round.
And the strategic situation shows that I can finish off everything this turn, as long as there are no more enemy heroes besides those two, and I don't expect any. First I hire one more fresh hero (Ruby the Knight) in my newly acquired castle, because she will have movement to reach and kill that first enemy as shown.
This sort of thing again is where HOMM strategy guides don't really tell you what happens in going for the best speed and scores. The guides say to build up one hero to maximize his stats and skills and effectiveness... but that all takes time that you don't need to take. Low-level heroes are interchangeable. You should freely pass troops between them and use them all for fighting. Newly-hired Ruby has only two fewer points of attack or defense than Crag Hack, and these troops are more than enough to do the job anyway.
Ruby easily knocks off those slow walkers with all of the shooter troops.
And my other hero (Fineous) that had followed Crag Hack can now finish the job, by picking up the troops from Ruby to attack that last enemy hero.
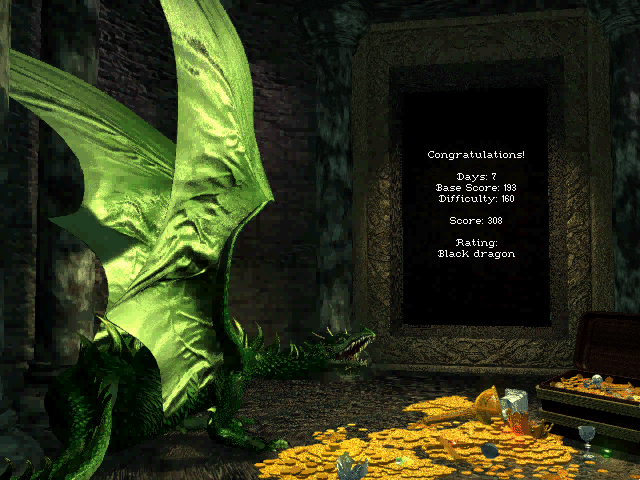
So there we go: won a medium-size scenario on the hardest difficulty in only 7 days. The score formula is 200 minus your days to completion, times the difficulty multiplier. That scale isn't particularly meaningful, except to note that "black dragon" is the highest subjective rating, and I exceeded that threshold by a substantial margin, I think it requires a score of 240 or so.
I don't intend to make a regular practice of HOMM writeups; most of the scenarios and all the campaigns have already been solved to the minimum possible time, and there really isn't any other goal in the game besides speed. But here's one for those who wanted to see it. For comments and discussion, see this thread at Realms Beyond.